How to turn on engraving for a Wix product: area in mm, text lines and font
Open the product in AI Engraving Text and stay on the Engraving tab. Enter the item size and engraving area in millimetres or drag the blue box on the photo, choose a font and the material, add up to three text lines with a label and character limit, then click "Save and turn engraving on".
Published
What do you need before you start?
- AI Engraving Text installed on your Wix site (see Part 1).
- The real size of the item and of the area you can engrave, in millimetres.
Step by step
Step 1 — Open the product
Go to Products, find the product and click Edit. The product opens on the Engraving tab.
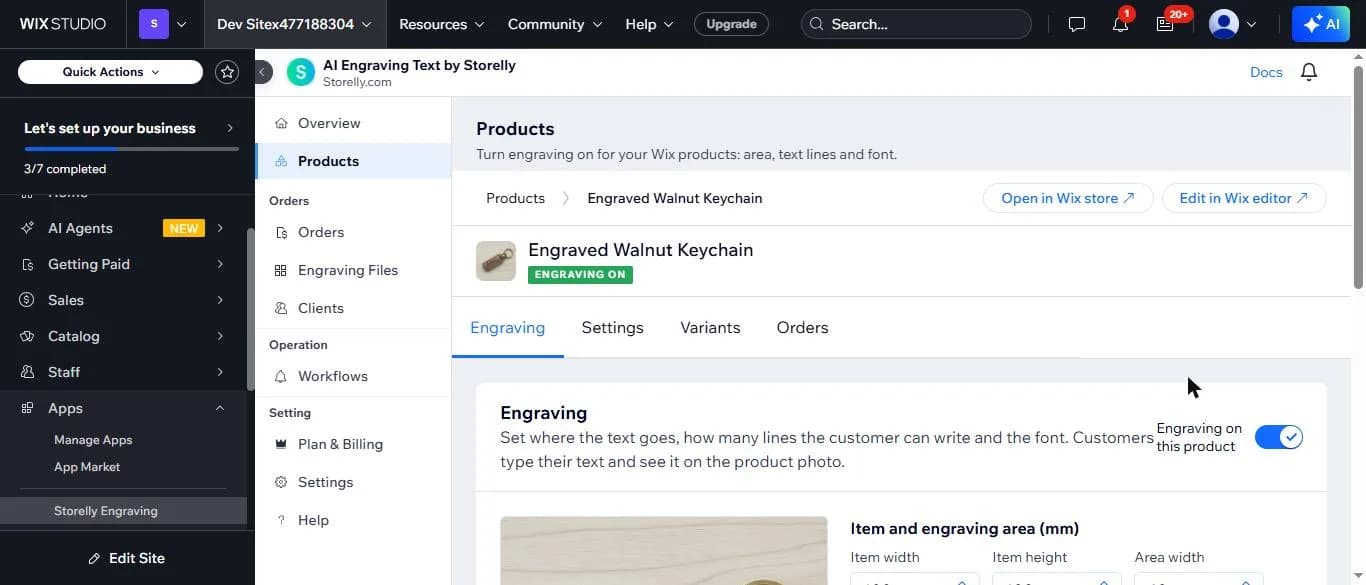
Expected result: You see the product name, its badge and the Engraving card with the "Engraving on this product" switch.
Step 2 — Set the item size and the engraving area in mm
Under "Item and engraving area (mm)", enter the item width and height, then the area width, area height and its distance from the left and top edges.
You can also drag the blue box on the product photo; the From left and From top values update as you move it.
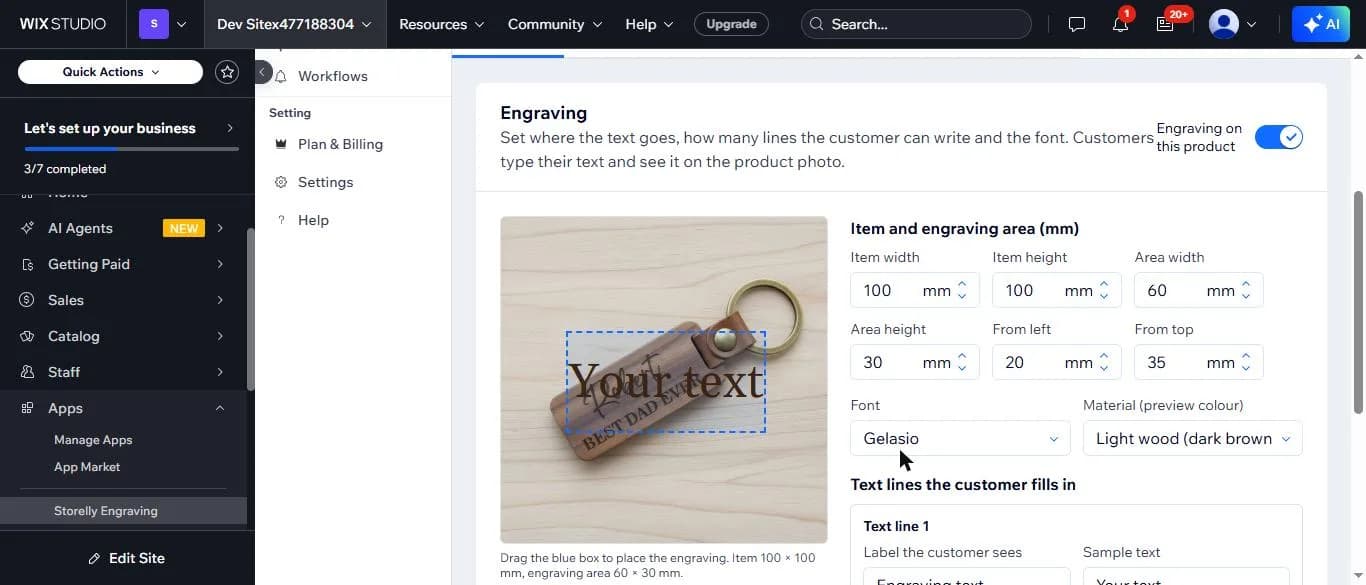
Expected result: The blue box sits where the engraving goes, and the line under the photo shows the item and area size in mm.
Step 3 — Choose the font and the material
Pick the font shoppers will see. Gelasio is the default; type in the field to find another font quickly. Then choose the material: glass, light wood, dark wood / walnut, leather and more. The material sets the colour of the preview, for example light text on dark wood.
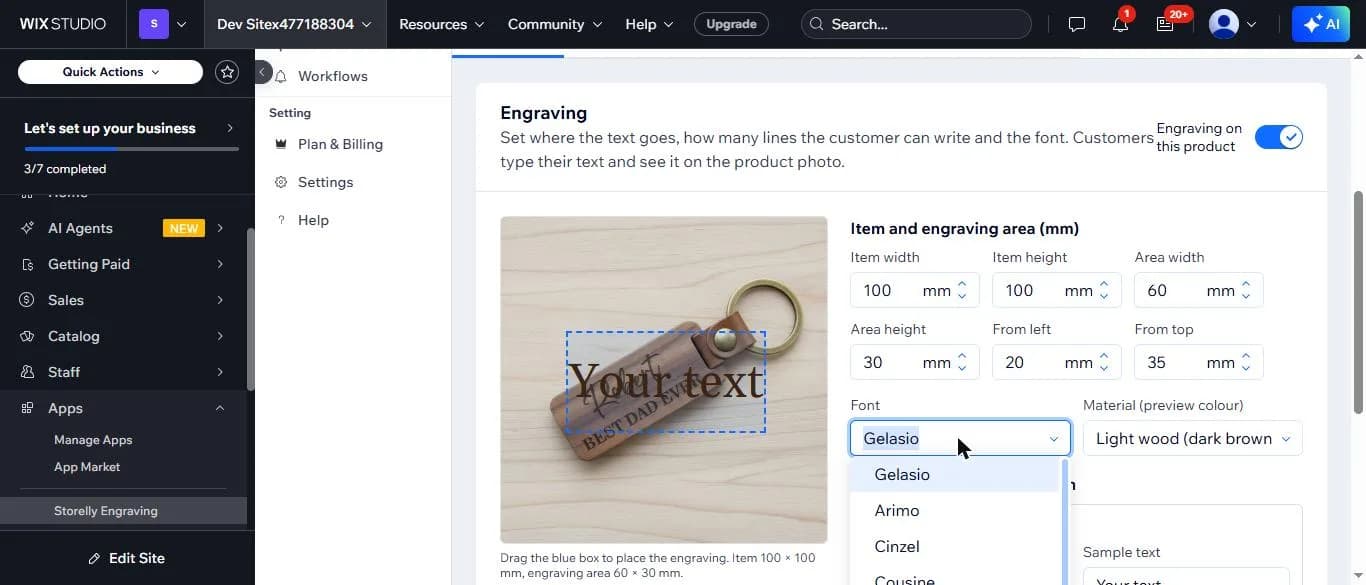
Expected result: The sample text on the photo changes to the font and colour you chose, and the engraving file uses the same font.
Step 4 — Add the text lines shoppers fill in
For each line, write the label shoppers see (for example "Family name"), a sample text, the maximum number of characters and the alignment. Tick Required if the line must be filled, and "Shrink long text to fit" to keep long names inside the area. Click "+ Add a text line" for a second or third line.
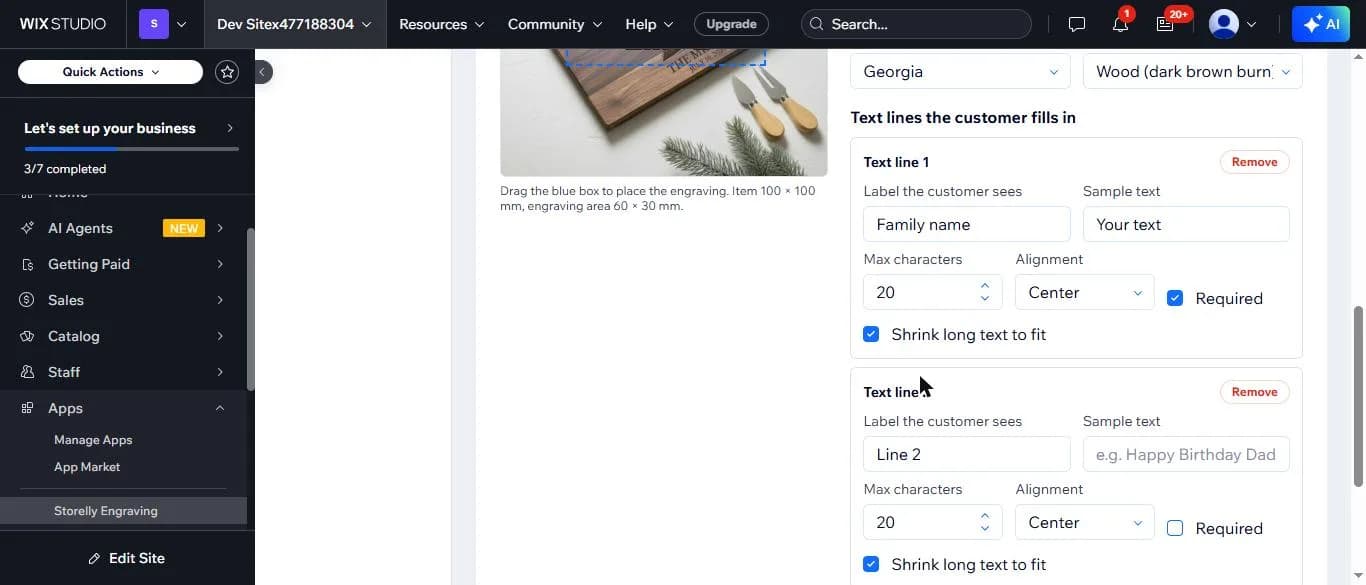
Expected result: Each line has its own card. Lines you mark Required must be filled before a shopper can add the product to the cart.
Step 5 — Save and turn engraving on
Click "Save and turn engraving on" at the bottom of the card. The next time you edit, the button reads "Save engraving".
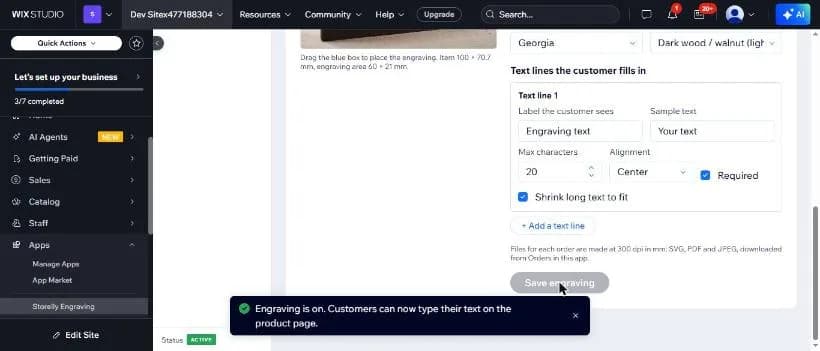
Expected result: A message confirms "Engraving is on. Customers can now type their text on the product page."
What if something does not work?
- The preview text is hard to read on my photo.
- Change the material. Dark wood / walnut shows light text; glass shows frosted white text.
- Long names spill outside the area.
- Tick "Shrink long text to fit" or lower the maximum number of characters for that line.
- Saving shows an error.
- Email [email protected] with your Wix site name and the product name, and we will check the setup with you.
Where can you get help?
Email [email protected] with your Wix site name and the step where you got stuck, and attach a screenshot if you can.